Thursday, August 29, 2013

Delightful Challenges, Make The Cut Challenge, and Butterfly Vickie Set!

Butterfly kisses
Happy Thursday!  For this week's Delightful Challenge, I used Wendy's adorable digital called  Butterfly Vickie Set.  Butterfly Vickie was printed out on my HP printer and then colored and shaded with copic markers.  Glitter was added to parts of her clothing for added shine.  My die cut was by Sizzex framelits.
My cardstocks are by Graphic 45 and Bazzill.  Last weekend I was at a miniature show in Ohio with a friend of mine and found these cute miniature roses.

This weeks theme :
Make the Cut!
(use die cuts, punches, decorative scissors)

Our Delightful Sponsor this week is our very own


Prize 


Why not join us!  We look forward to seeing your beautiful creations!

Thursday, August 22, 2013

Delightful Challenge, A Back To School Challenge and May Cupcake Set from Digital Delights!

BTS Denise
For this 12X12 Scrapbook layout I used one of Wendy's adorable digitals from the May Cupcake Set
Here is a close up of this adorable digital!  For this layout, I enlarged my image using my HP printer.  Then it was printed out, colored and shaded with copic markers.  Crystal lacquer was added to the apples and pencils for dimension.  Fine glitter was added to my cupcakes icing to finish it off.  My cardstocks are by doodlebug.  Just perfect for recording the first day of school!

This weeks theme :
Back to School
(Use primary colors)

We have a new Delightful Sponsor this week 


http://www.magnoliastamps.us/

Thursday, August 15, 2013

Delightful Challenges Anything But A Card and Jubbly Dog

jubbly tag
For this week's challenge, I created this adorable gift tag for a doggie gift that I am giving to a friend of mine.  My cardstocks are by DCWV (older line from my stash).  I used Wendy's adorable Digital Stamp called  Jubbly Dog.  My doggie was printed out on my HP printer and then colored and shaded with copic markers.  My ribbon was colored with copics also to coordinate.

This weeks theme :
Anything but a Card!

Our Delightful Sponsor this week is


Prize 
$15 store gift card

Thursday, August 8, 2013

Delightful Challenges Pop it up and CELEBRATION CHARLIE!

Celebration Charlie Pop Up Challenge
For my DT card for this challenge, I used  the adorable stamp called Celebration Charlie.
I printed my  image out on my HP printer and then colored and shaded it with copic markers.  I layered and popped up my bear and balloons up to 3 times, as well as one of the background layers.  My flower was handmade with spellbinders.  I used pearls, trim, and cardstock from my too big stash.  My background was embossed with a sizzex folder!  What fun!  This card is going to a dear friend who is mad about bears.  

This weeks theme :
Make it Pop!
add layers or use dimension

Our Delightful Sponsor this week is

Monday, August 5, 2013

Hostess Monday Tutorial With Denise - How To Make Buttons Out Of Cardstock

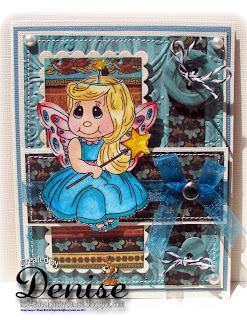
Welcome to Hostess Monday!  For this card I made handmade buttons!  So easy to make and a great inexpensive accent for your cards and crafty projects.  For my card I used one of Wendy's adorable digitals called Felicia Fairy.  (*note*  Felicia Fairy has just been retired, but she will be added to the next DVD collection -coming out very soon) She was printed out on my HP printer and then colored and shaded with copic markers.  My cardstocks are by Graphic 45.

How To Make Paper Buttons Out Of Cardstock


Supplies:
Cardstock
Glue Pen
Crystal Lacquer (any brand)
Crop a Dile
Punches of choice
(I have used heart punch and 2 round punches)
(Any smaller punch can be used)
sandpaper or sanding block (optional)

For Heart Button:
 Step 1
punch out 5 heart pieces


Step 2
Using glue pen stack all hearts together, making them as straight as possible.  (If you get a little crooked, you can sand with a sanding block)

Step 3
With a pencil mark where the holes should be punched.

Step 4
Using the Crop a Dile punch 2 holes
Step 5
Place heart on wax paper or plastic wrap
Using crystal lacquer (any kind will do- I am using Close To My Heart Brand) cover sides and top of button and let dry.
Step 6
To make circle buttons punch out 5 of the largest circle
Step 7
Punch out 5 of the smallest circle on the cardstock
Step 8
Using larger punch cut out rings
Step 9
Assemble pieces (Trim or sand pieces if necessary)

Step 10
Add crystal lacquer of your choice on wax paper or plastic wrap

Let dry and add string or ribbon